Camping Satellite Internet: How to Stay Connected Off the Grid

Camping Satellite Internet: How to Stay Connected Off the Grid
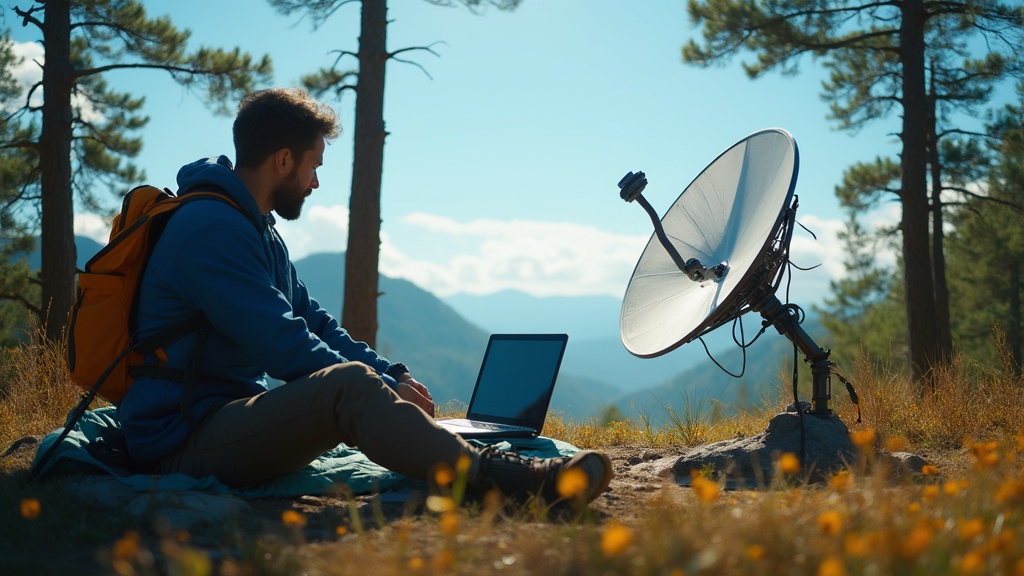
Hook: Imagine waking up in the middle of nowhere, but still video‑chatting with your family, checking the weather, and uploading trail photos in real time. It sounds like a sci‑fi dream, yet with the right satellite setup it’s a practical reality for today’s camper.
Context: Staying connected isn’t just a luxury; it’s a safety net. A reliable signal can mean the difference between a quick rescue call and a night of waiting for a flare. Plus, a stable internet connection lets you stream maps, share experiences, and keep the home office humming—even when you’re under a canopy of stars.
What is satellite internet and how does it work for campers?
Satellite internet beams data between a ground‑based dish and an orbiting satellite. Unlike cellular networks, the signal doesn’t depend on cell towers, so you can get coverage in remote valleys, high‑altitude passes, and even desert expanses. The most popular consumer constellations—Starlink, HughesNet, and Viasat—offer portable kits designed for mobile users.
"Satellite internet has become the most viable off‑grid connectivity solution for serious wilderness explorers." — Starlink Official Site
Which satellite providers are worth considering for off‑grid trips?
| Provider | Typical Speed | Data Caps | Approx. Cost (US) | Best For |
|---|---|---|---|---|
| Starlink | 50‑150 Mbps (download) | Unlimited (fair‑use) | $119/month + $599 kit | High‑bandwidth streaming, live‑streaming hikes |
| HughesNet | 25‑50 Mbps | 10‑30 GB/month | $69.99/month + $399 kit | Budget‑friendly, reliable in wooded areas |
| Viasat | 12‑30 Mbps | 12‑50 GB/month | $70/month + $350 kit | Good for mixed terrain, lower latency |
Pro tip: If you travel across the U.S., Starlink’s global coverage gives you the least hassle switching providers between states.
How do I set up a reliable satellite connection in the wilderness?
- Choose a clear sky spot — Aim for at least a 30° view of the southern horizon (or northern in the southern hemisphere). Trees, cliffs, and dense foliage can block the signal.
- Level the dish — Use a portable tripod or a sturdy ground‑anchor kit. Most modern kits include a built‑in level sensor.
- Power it up — Connect the dish to a 12 V power source (portable power station, solar panel, or your vehicle’s battery). See my recent post on Portable Power Stations vs Solar Panels for a power‑budget breakdown.
- Run the app — Download the provider’s app (Starlink, HughesNet, Viasat) on your phone or laptop. Follow the on‑screen alignment wizard; it will fine‑tune the dish automatically.
- Secure the cable — Use a short, weather‑rated Ethernet cable and protect connections with silicone tape to prevent moisture ingress.
What gear do I need beyond the dish itself?
- Portable power station — 500 Wh or more for a full night of use. My favorite is the EcoFlow Delta 1300 (review coming soon).
- Compact solar panel — A 100 W foldable panel keeps the power station topped up during daylight. See the guide on How to Set Up a Portable Solar Shower for solar‑panel mounting tricks.
- Weather‑proof enclosure — A small, UV‑resistant box protects the dish’s electronics from rain and dust.
- Cable management clips — Keep the Ethernet tidy and prevent tripping hazards.
How can I keep my setup powered and weather‑proof?
- Sun‑tracking solar panels: Tilt them toward the sun as the day progresses; a simple hinge works wonders.
- Battery buffer: Keep a 20 % charge reserve in your power station for cloudy days.
- Rain shield: A lightweight tarp over the dish, anchored with bungee cords, deflects rain while still allowing the signal to pass.
- Temperature considerations: In sub‑zero environments, insulate the power station with a reflective blanket to maintain battery efficiency.
Common mistakes and pro tips
- Mistake: Setting up under dense canopy. Fix: Scout the site at sunrise; the early light reveals clear sightlines.
- Mistake: Relying on a single power source. Fix: Pair a solar panel with a power station for redundancy.
- Mistake: Ignoring data limits. Fix: Enable data‑saving mode in the app and prioritize essential services (maps, emergency alerts).
- Pro tip: Keep a spare USB‑C to Ethernet adapter handy. Some newer laptops lack Ethernet ports, and a wired connection dramatically improves stability.
- Pro tip: If you’re traveling in a van, mount the dish on a roof‑rack swivel mount. It lets you stay inside the vehicle while the dish tracks the sky.
Takeaway
Staying connected off the grid is no longer a pipe‑dream. By choosing the right provider, positioning your dish for a clear sky view, and powering it with a reliable solar‑plus‑battery combo, you can enjoy fast, dependable internet wherever your campsite lies. Test your setup at home before you head out, and always keep a backup power plan—your next adventure (and safety) depends on it.
Frequently Asked Questions
{
  "meta": {
    "faqs": [
      {"question": "How far can a satellite dish be from the antenna?", "answer": "The dish itself contains the antenna; the only distance limitation is the length of the power and Ethernet cable, typically up to 30 ft for reliable signal transmission."},
      {"question": "Can I use satellite internet in dense forest?", "answer": "A clear line‑of‑sight to the sky is essential. In dense forest, look for a clearing or set up on a ridge where trees don’t block the view."},
      {"question": "What’s the typical data limit for camping plans?", "answer": "Starlink offers unlimited data with a fair‑use policy, while HughesNet and Viasat cap at 10‑50 GB per month. Choose a plan based on your expected usage (maps, streaming, or just email)."}
    ]
  }
}
Published on March 16, 2026 by Bridget O'Sullivan.