Van Life Winterizing Checklist: Stay Warm & Efficient This Winter

What’s the biggest challenge when winter hits your van?
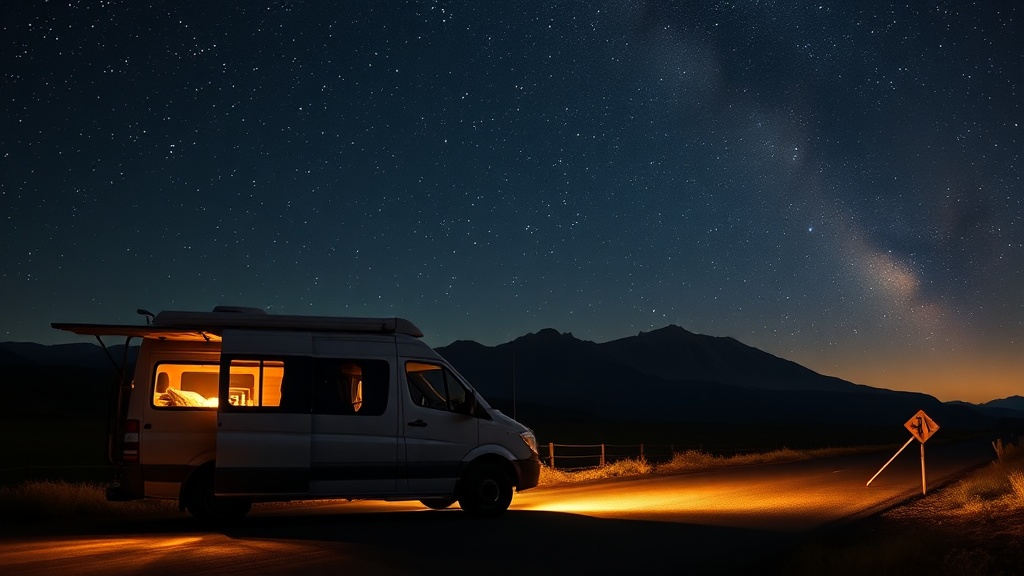
\nImagine pulling into a snow‑blanketed campsite, the temperature dipping below freezing, and your heater sputters to life only to gasp out. It’s a scenario I’ve lived through—over 600 nights on the road taught me that a cold van isn’t just uncomfortable; it can drain batteries, freeze pipes, and turn a dream trip into a nightmare.
\n\nWhy winterizing matters for every van lifer
\nWinterizing isn’t a luxury add‑on; it’s a survival kit. Proper insulation, reliable heat, and smart power management keep you safe, extend your gear’s life, and let you enjoy the quiet beauty of snow‑capped landscapes without shivering in your sleeping bag.
\n\nWhat you’ll need before you start
\n- \n
- Thermal insulated window covers (Reflectix or DIY foam board) \n
- Rigid foam board or spray‑foam for walls and ceiling \n
- Portable diesel or propane heater (e.g., diesel heater with thermostat) \n
- High‑capacity lithium battery bank and smart charge controller \n
- Weather‑proof power cords, extension cords, and a surge protector \n
- Water‑resistant floor liner and sealant tape \n
- Thermal curtains or blackout fabric for privacy and heat retention \n
Step‑by‑step winterizing checklist
\n1. Seal every draft – How do I stop cold air from sneaking in?
\nCheck the perimeter of doors, windows, and roof vents. Apply weather‑stripping tape and use reflective window covers. For larger gaps, spray‑foam works wonders, but be careful not to over‑apply.
\n\n2. Insulate the shell – Which material gives the best bang for the buck?
\nRigid foam board (polyiso) offers a high R‑value per inch and is easy to cut. Attach it to interior walls and ceiling with adhesive or double‑sided tape. For curved surfaces, use flexible spray‑foam for a seamless seal.
\n\n3. Upgrade your heating – What’s the safest heat source?
\nMy go‑to is a diesel heater with automatic thermostat. It runs off the same fuel you use for cooking, stays warm for hours, and has built‑in carbon monoxide detection. If you prefer propane, a portable propane heater with a proper vent is a solid backup.
\n\n4. Manage power wisely – How can I avoid dead batteries?
\nPair your heater with a high‑capacity lithium battery bank and an MPPT charge controller. Keep the battery insulated with a battery blanket to maintain performance in sub‑zero temps. Use a solar panel (see my solar guide) for daytime recharge, but remember the sun’s angle drops sharply in winter.
\n\n5. Protect water systems – Will my pipes freeze?
\nInsulate all water lines with foam pipe wrap and add a small electric tank heater (example). If you’re using a portable water tank, store it inside the insulated cabin whenever possible.
\n\n6. Prepare for emergencies – What should be in my winter kit?
\n- \n
- Carbon monoxide detector with battery backup \n
- Fire extinguisher (Class B) \n
- Thermal blankets and extra warm clothing layers \n
- Snow shovel and traction mats for icy parking spots \n
- Portable power bank and spare fuses \n
Pro tips you won’t find in a generic guide
\n- \n
- Heat‑reflective floor mats: Place them under your sleeping pad to bounce heat back up from the heater. \n
- Ventilation trick: Slightly open a vent while the heater runs to prevent moisture buildup – the heat still circulates but condensation stays low. \n
- Battery monitoring app: I use Tesla’s Powerwall app (works with many lithium banks) to get real‑time state‑of‑charge alerts. \n
Common mistakes and how to avoid them
\n- \n
- Over‑insulating without ventilation: Leads to condensation and mold. Always leave a tiny vent open. \n
- Relying on a single heat source: If your heater fails, you’re left freezing. Keep a backup propane heater handy. \n
- Running the heater on low‑quality fuel: It can clog the burner and reduce efficiency. Use clean diesel or propane. \n
- Ignoring battery temperature: Cold batteries lose capacity fast. Warm them with a blanket or keep them inside the insulated cabin. \n
What’s next after you’ve winterized?
\nHead up to the mountains, chase the Northern Lights, or simply enjoy a quiet snow‑covered forest. With your van sealed, heated, and powered, the only thing left to worry about is which trail to explore next.
\n\nTakeaway: Your winter‑ready van in a nutshell
\nSeal drafts, add insulation, choose a reliable heater, protect your power and water systems, and pack an emergency kit. Follow this checklist and you’ll turn bitter‑cold nights into cozy, unforgettable adventures.
\n\n\nSteps
- 1
Seal every draft – How do I stop cold air from sneaking in?
Check doors, windows, and roof vents. Apply weather‑stripping tape and reflective window covers. Use spray‑foam for larger gaps.
- 2
Insulate the shell – Which material gives the best bang for the buck?
Install rigid foam board on interior walls and ceiling. For curved surfaces, use flexible spray‑foam for a seamless seal.
- 3
Upgrade your heating – What's the safest heat source?
Install a diesel heater with automatic thermostat and CO detection. Keep a propane heater as a backup.
- 4
Manage power wisely – How can I avoid dead batteries?
Pair a high‑capacity lithium battery bank with an MPPT charge controller and battery blanket. Use solar panels for daytime recharge.
- 5
Protect water systems – Will my pipes freeze?
Wrap water lines with foam pipe wrap and add a small electric tank heater. Store portable water tanks inside the insulated cabin.
- 6
Prepare for emergencies – What should be in my winter kit?
Include a carbon monoxide detector, fire extinguisher, thermal blankets, extra warm layers, snow shovel, traction mats, and spare fuses.