Why Your Camp Cooler Keeps Warm Food

Pre-Chilling Your Cooler
The Problem with Warm Drinks
Air Gaps and Empty Space
Improper Ice Placement
Opening the Lid Too Often
The Myth of the "Perfect" Cooler
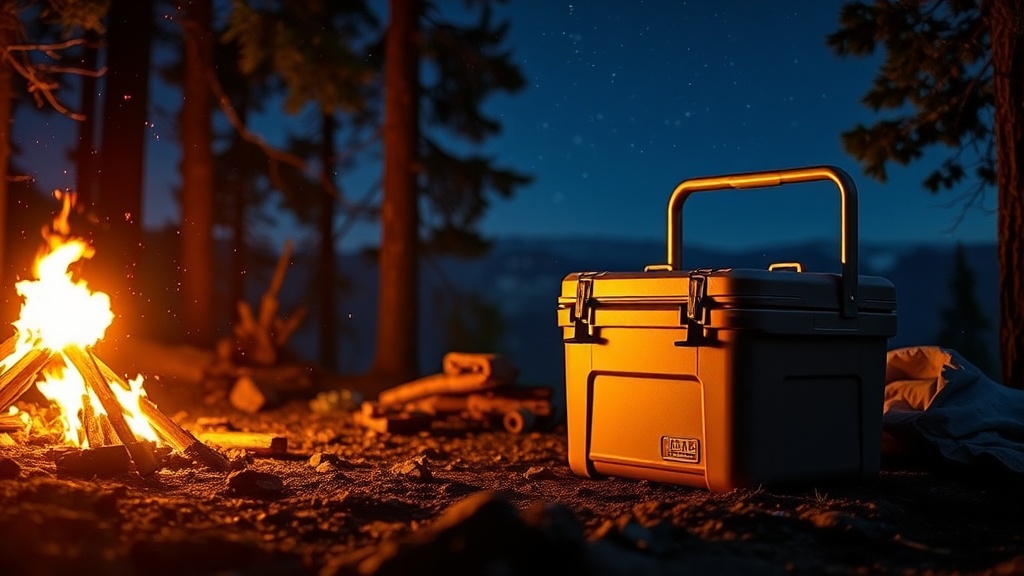
Most campers believe that a high-end, rotomolded cooler is a foolproof insurance policy against warm food. They assume that if they spend $300 or $400 on a brand like YETI or RTIC, their perishables will stay at a safe temperature regardless of how they are packed. This is a fundamental misunderstanding of thermodynamics. A cooler is not a refrigerator; it is a thermal insulator designed to slow down the transfer of heat. If you use your cooler incorrectly, even the most expensive heavy-duty model will fail to keep your chicken or deli meats at a safe temperature, leading to foodborne illness and wasted money.
Understanding why your food is warming up is essential for long-term road trips and extended stays on public lands. Whether you are parked at a BLM site in the high desert of Utah or a forest campsite in the Cascades, temperature management is a matter of food safety. This guide breaks down the specific mechanical and behavioral reasons why your food is losing its chill and how you can fix it.
1. You Are Relying on Ice Instead of Frozen Mass
The biggest mistake travelers make is packing a cooler with loose ice cubes and expecting them to last. Ice cubes have a high surface-area-to-volume ratio, meaning they melt rapidly. Once that ice turns to water, you are left with a lukewarm liquid that actually accelerates the warming of your food through convection. When your food sits in a pool of melting ice water, it is much more susceptible to temperature fluctuations.
To maintain a consistent temperature, you need to utilize frozen mass. Instead of buying several 10-pound bags of ice from a gas station, freeze your liquids and heavy items before you leave. Use frozen gallon jugs of water or even frozen juice containers. These large blocks of ice take much longer to melt than small cubes and provide a more stable thermal base. If you are traveling through a hot climate like Arizona, supplement these frozen jugs with high-quality gel packs like Arctic Ice, which are designed to maintain lower temperatures for longer periods than standard ice.
2. The "Air Gap" Problem
Air is the enemy of a cold cooler. If you open your cooler and see large pockets of empty space between your food containers and the ice, you have created an "air gap." Every time you lift the lid, the heavy, cold air stays at the bottom, but the light, warm air rushes in to fill the empty space. This cycle of heat exchange is what causes your food to warm up even if the ice hasn't fully melted yet.
To prevent this, you must pack your cooler tightly. Use the "fill the gaps" method. If you have extra space around your Tupperware or meat containers, fill those voids with smaller items like canned goods, or even smaller bags of ice. If you are using a large 50-quart cooler for only a few days of food, you are essentially creating a large chamber of air that will heat up quickly. In these cases, it is better to use a smaller, more appropriately sized cooler so that the contents are packed closely together, minimizing the amount of air that can circulate.
3. Poor Layering Strategy
Temperature gradients exist inside every cooler. Heat rises, and cold sinks. If you place your most sensitive items—like raw proteins or dairy—at the top of the cooler, they will be the first things to warm up. Many people make the mistake of placing their heavy items at the bottom and then piling lighter, more delicate items on top, but they often forget that the ice is what provides the cooling power from the bottom up.
The most effective way to layer is to place your frozen jugs and heavy ice at the very bottom. Place your most temperature-sensitive items, such as raw chicken or steak, directly against or underneath the ice. Your vegetables and fruits should go in the middle, and items that can handle slightly higher temperatures, like condiments or hard cheeses, should go near the top. If you find that your food is consistently warming up, you might want to check if your camp coffee is always too cold, as this is often a sign of a broader issue with how you are managing thermal energy in your camp kitchen.
4. Frequent Lid Opening and "The Peek"
Every time you open the lid to "check" on something, you are losing the cold air you worked so hard to build up. This is particularly problematic during meal prep or while you are hanging out at a campsite. If you are constantly reaching in for a soda or a snack, the internal temperature of the cooler will steadily climb. This is a common issue during long road trips where people are frequently stopping at rest areas or scenic overlooks.
To mitigate this, organize your cooler so that you can find what you need without searching. Use clear, labeled containers so you don't have to dig through the ice to find the mustard or the eggs. If you are traveling with a group, designate a "drink cooler" and a "food cooler." The drink cooler will be opened dozens of times a day, while the food cooler should remain closed and undisturbed as much as possible. This keeps the core temperature of your food stable while allowing for the high-frequency access needed for beverages.
5. Neglecting the Pre-Chill Process
Most people take their cooler straight from a warm garage or a hot car trunk and immediately start packing it with food. If the interior walls and the insulation of the cooler are warm, they will immediately begin absorbing the "cold" from your ice and food. This is a massive waste of your cooling resources. The cooler is essentially working overtime just to cool down the container itself before it even starts cooling your food.
Always pre-chill your cooler. A few hours before you pack, place a sacrificial bag of ice or several frozen water bottles inside the empty cooler. This brings the internal temperature of the insulation down to a baseline. Once the interior feels cold to the touch, dump the sacrificial ice and begin packing your actual food and fresh ice. This small step can extend the life of your ice by several hours, which is critical when you are deep in the backcountry and far from a grocery store.
6. Improper Placement in the Vehicle or Campsite
Where you place your cooler is just as important as how you pack it. If you keep your cooler in the bed of a truck or in the trunk of a car that has been sitting in the sun, the ambient heat will penetrate the lid and the sides through conduction. Even the best insulation cannot fight a constant influx of high-intensity heat. If your cooler is sitting on a hot asphalt parking lot or a sun-baked dirt patch, the bottom of the cooler will absorb that heat rapidly.
Always keep your cooler in the shade. If you are camping in an area without natural tree cover, use a lightweight tarp or a specialized cooler cover to create a shadow. If you are traveling in a van or an SUV, keep the cooler on the floor of the vehicle rather than on a seat, as the floor is generally cooler and less exposed to direct sunlight through the windows. If you notice that your water is also getting warm, you might be dealing with a broader temperature regulation issue, similar to why your camp water tastes like plastic due to heat exposure.
7. The Role of Water Management
A common tactic is to leave the water that has melted from the ice inside the cooler, thinking it will help keep things cold. While it is true that water is a better conductor of cold than air, this is a double-edged sword. If the water reaches room temperature, it will actually heat up your food faster than air would. If you see the water in your cooler becoming lukewarm, you must drain it immediately.
The best way to manage this is to use watertight containers for all your food. This prevents your food from getting soggy and keeps the water levels predictable. If you are using a large amount of ice, consider using a "dry" method where you use sealed ice packs or frozen jugs rather than loose ice. This eliminates the water issue entirely and keeps your food dry and at a consistent temperature. If you do use loose ice, drain the water at least twice a day to ensure you aren't sitting your food in a lukewarm bath.
Summary Checklist for Cold Food
Before you head out on your next trip, run through this quick checklist to ensure your food stays safe:
- Pre-chill the cooler: Use sacrificial ice to cool the interior walls first.
- Freeze your mass: Use frozen gallon jugs instead of just ice cubes.
- Pack tight: Eliminate air gaps by filling every corner with small items or ice.
- Layer correctly: Heavy ice on the bottom, meat next, then vegetables, then light items.
- Minimize access: Use a separate cooler for drinks to keep the food cooler closed.
- Find the shade: Never leave your cooler in direct sunlight or a hot car trunk.
- Drain the water: If using loose ice, don't let the water become lukewarm.